| |
Modeling: arms and hands
Again, I'll only show an example of a human figure.
After you've modeled the head, chest and shoulders, it's time to work on the arms.
For now, only model the biceps and triceps. You've already done the
shoulders, so you should be able to see where the biceps should be:
starting in the corner of the armpit and under the shoulder part all
the way to the end of the upper arm.
 Turn your model around and model the triceps. They don't have to be
anatomically correct, just model them so they look convincing to you.
Turn your model around and model the triceps. They don't have to be
anatomically correct, just model them so they look convincing to you.
Turn it around again and model the lower arm by putting a roll of clay
on top of the lower arm.
Smooth it out. Take a tiny ball of clay and model the elbow. This gives
a good starting point for the other muscles of the lower arm.
It is also a endpoint for the triceps
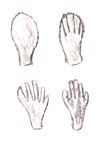 After you've finished most of the body, you can make the hands.
Start with a flat piece of clay, make four cuts in it, and gently shape the fingers and thumb.
If your figure is holding something, shape the hands around the object it's holding.
With fantasy models, you can vary the number and length of the fingers.
Look at the sketches you've made.
After you've finished most of the body, you can make the hands.
Start with a flat piece of clay, make four cuts in it, and gently shape the fingers and thumb.
If your figure is holding something, shape the hands around the object it's holding.
With fantasy models, you can vary the number and length of the fingers.
Look at the sketches you've made.


|
